


 4,8
4,8 Our site uses only technical cookies to improve your browsing experience. To see which cookies we use, consult the Privacy Policy page.
(0) items
You have no items in your shopping cart.
Shopping cart
Search
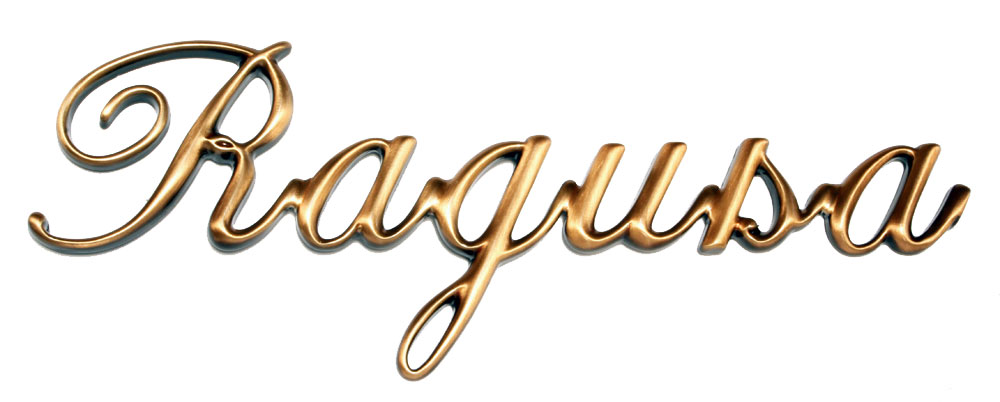
Technical sheet - Palatino Italic Letters
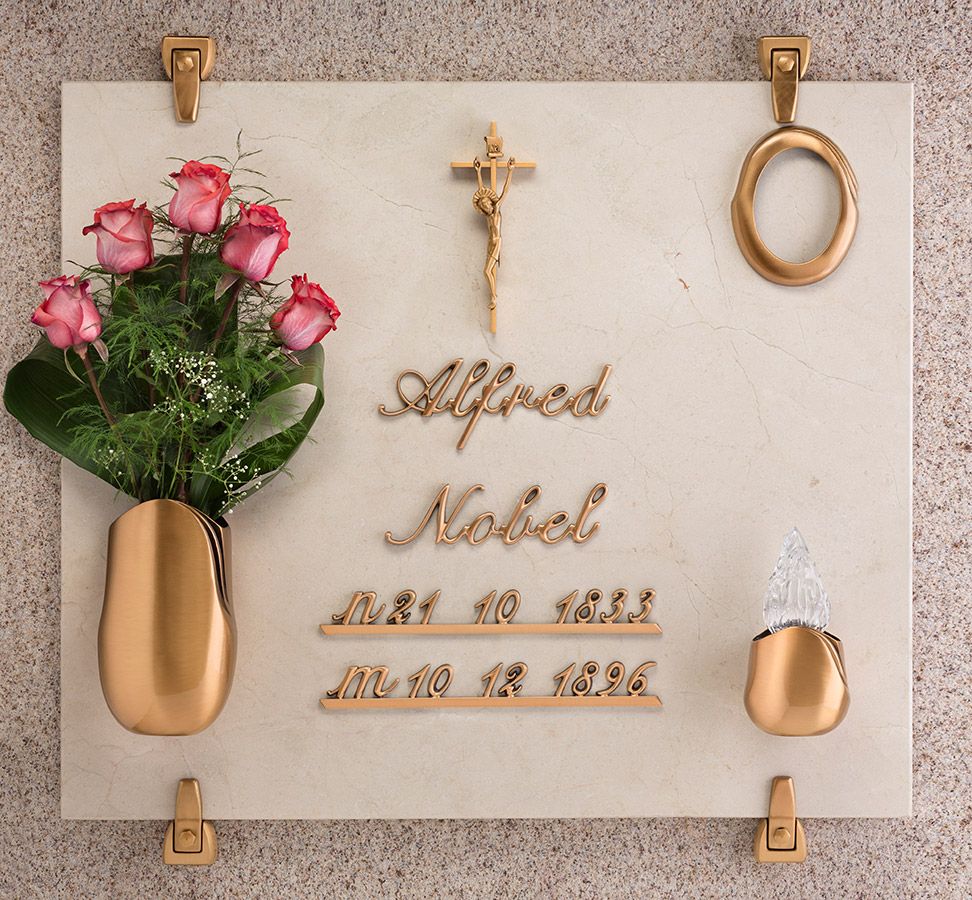
Real Votiva produces a wide range of letters and numbers in bronze, steel and porcelain; such characters are suitable for gravestones and can be used for the composition of names and dates of birth and death for epigraphs, dedications and epitaphs on headstones
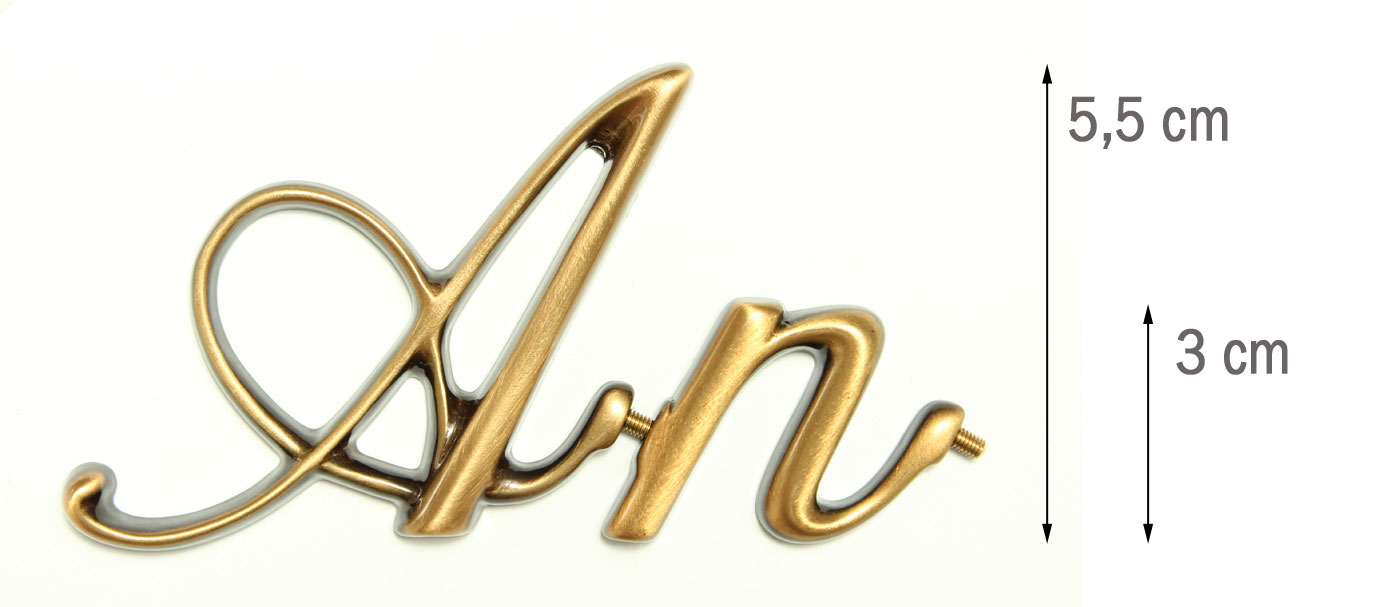
“Italic” style characters are available in the following sizes:
- Capital letters, height cm 5,5
- Lowercase letters, height cm 3
This kind of characters are also available in different marble colour versions, such as Carrara, Botticino, Black Marquinia, Guatemala Green, black and white or in ceramismalt, or colour variants like mercury, gold and glitter. The letters are treated with a special coating that ensures resistance to weather and time, especially for the graves planted outdoors.
Important. This technical sheet refers to the "Italic" style bronze letters, for all colours and finishes available in the catalogue.
Hereby are the instructions for purchasing and installation of the letters.
1. Epigraph composition with Italic characters
Epigraph composition with Italic characters is subject to the following rules:
- First name/Surname: for first names and surnames first letter it’s used the 5,5 cm height uppercase letter followed by 3 cm height lowercase letters.
- Dates: for birth and death dates composition it is used a bronze bar on which are fixed the numbers and the star and cross symbols. Bronze bars can have different lengths:
- 31 cm bar: it is used for long date format with star/cross symbol up to 9 items, i.e. eight numbers plus star or cross (for example “+ 12 10 2015”);

- 23 cm bar: it is used for long date format without star/cross symbol up to 8 items, i.e. eight numbers plus star or cross (for example “12 10 2015”);

- 18 cm bar: it is used for short date format with star/cross symbol up to 5 items, i.e. four numbers plus star or cross (for example “+ 2015”);

- 10 cm bar: it is used for short date format with star/cross symbol up to 5 items, i.e. four numbers plus star or cross (for example “2015”).

- 31 cm bar: it is used for long date format with star/cross symbol up to 9 items, i.e. eight numbers plus star or cross (for example “+ 12 10 2015”);
- Dates with loose numbers: alternatively, dates can be composed using loose numbers; in this case each individual number will be provided with two rear pins for attachment to the surface.

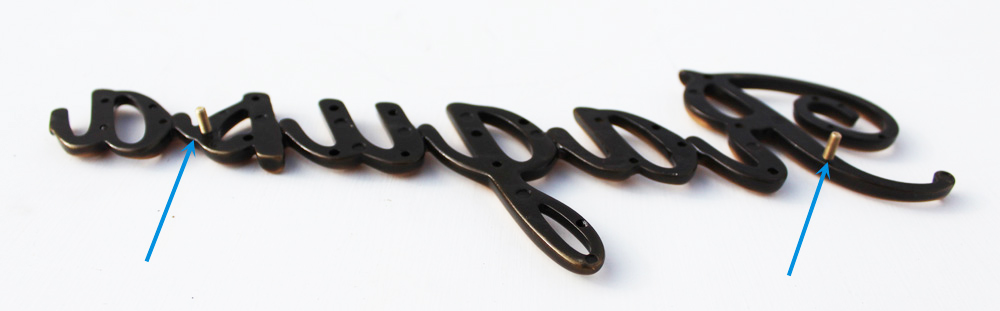
The names and dates on bronze bars are delivered already assembled in a single block and ready for fixing. Each single block (first name, surname, date) is fixed by means of 2 or 3 pins fixed in the rear of the entire block (see figure below).
2. Italic characters assembly modes
Italic characters can be assembled in two ways:
- Screwed characters:
- first name and surname characters are screwed together;
- dates are screwed on bronze bar.
- Welded characters:
- first name and surname characters are welded together;
- dates are welded on bronze bar.
The above does not apply to dates made with loose numbers.
3. How to purchase the letters
To buy the desired letters proceed as follows:
- Access the website: www.realvotivastore.com.
- Select the category “Types” from the main page or the general catalogue page.
- Select the sub-category "Bronze".
- Select the desired model, such as “Characters for gravestones. Palatine Cursive”.
- In the detail page of the selected model, there are multiple item variants, for example, "Uppercase letters to be screwed - cm 5,5", "Lowercase letters to be screwed - cm 3" etc.
- According to the text to compose and to the rules described above at point 1, select each letter to be purchased from the list next to the entry "Select character" and specify the number of pieces in the text box beside the button "Add to Cart", then click that button. Repeat this step for all the letters and numbers to be ordered (in case of mistakes you can make changes in the order summary page displayed during confirmation order that is in the Cart). Please, pay attention in choosing uppercase and lowercase characters, and between loose numbers and numbers to be screwed on bars.
4. How to fix the Italic Letters
The process includes the following steps:
1. Mark the drilling points on the surface. Position each block of text on the surface of application and mark the points in which you have to drill holes corresponding to the rear pins.
2. Drilling the surface. Drill holes at the points indicated on the surface using a drill bit with a diameter slightly greater than the diameter of the pins to permit the application of the mastic inside the holes. At the end, remove the strips from the surface and blow all the holes in order to remove the dust accumulated inside.
3. Preparation of the mastic. To facilitate the application of mastic inside the holes, it is recommend using a liquid but viscous mastic. Using clean tools, take out from the tin the amount of mastic to use and add the right amount of catalyst paste (according to the quantities indicated on the package, e.g. from 1 to 3 grams of hardener per 100 grams of product); mix the two components by means of a spatula. Note that the curing time will shorten with temperatures above 25° C and will be longer with lower temperatures.
4. Application and fixing of the letters. Introduce a sufficient amount of mastic inside each hole and then put the related letters (you may want to keep the letters on hand next to the holes in the sequence of application to avoid loss of time). Spillage of mastic can be removed before the complete hardening, as soon as it becomes solid but soft and chewy, with a thin knife or a spatula.
Real Votiva Store - Funeral Articles Sales
Funeral art - Online sale of funeral articles and accessories in bronze, porcelain and steel for tombstones and cemetery chapels.
Supplies for funeral honors - Sacred art and religious articles.
Funeral art - Online sale of funeral articles and accessories in bronze, porcelain and steel for tombstones and cemetery chapels.
Supplies for funeral honors - Sacred art and religious articles.